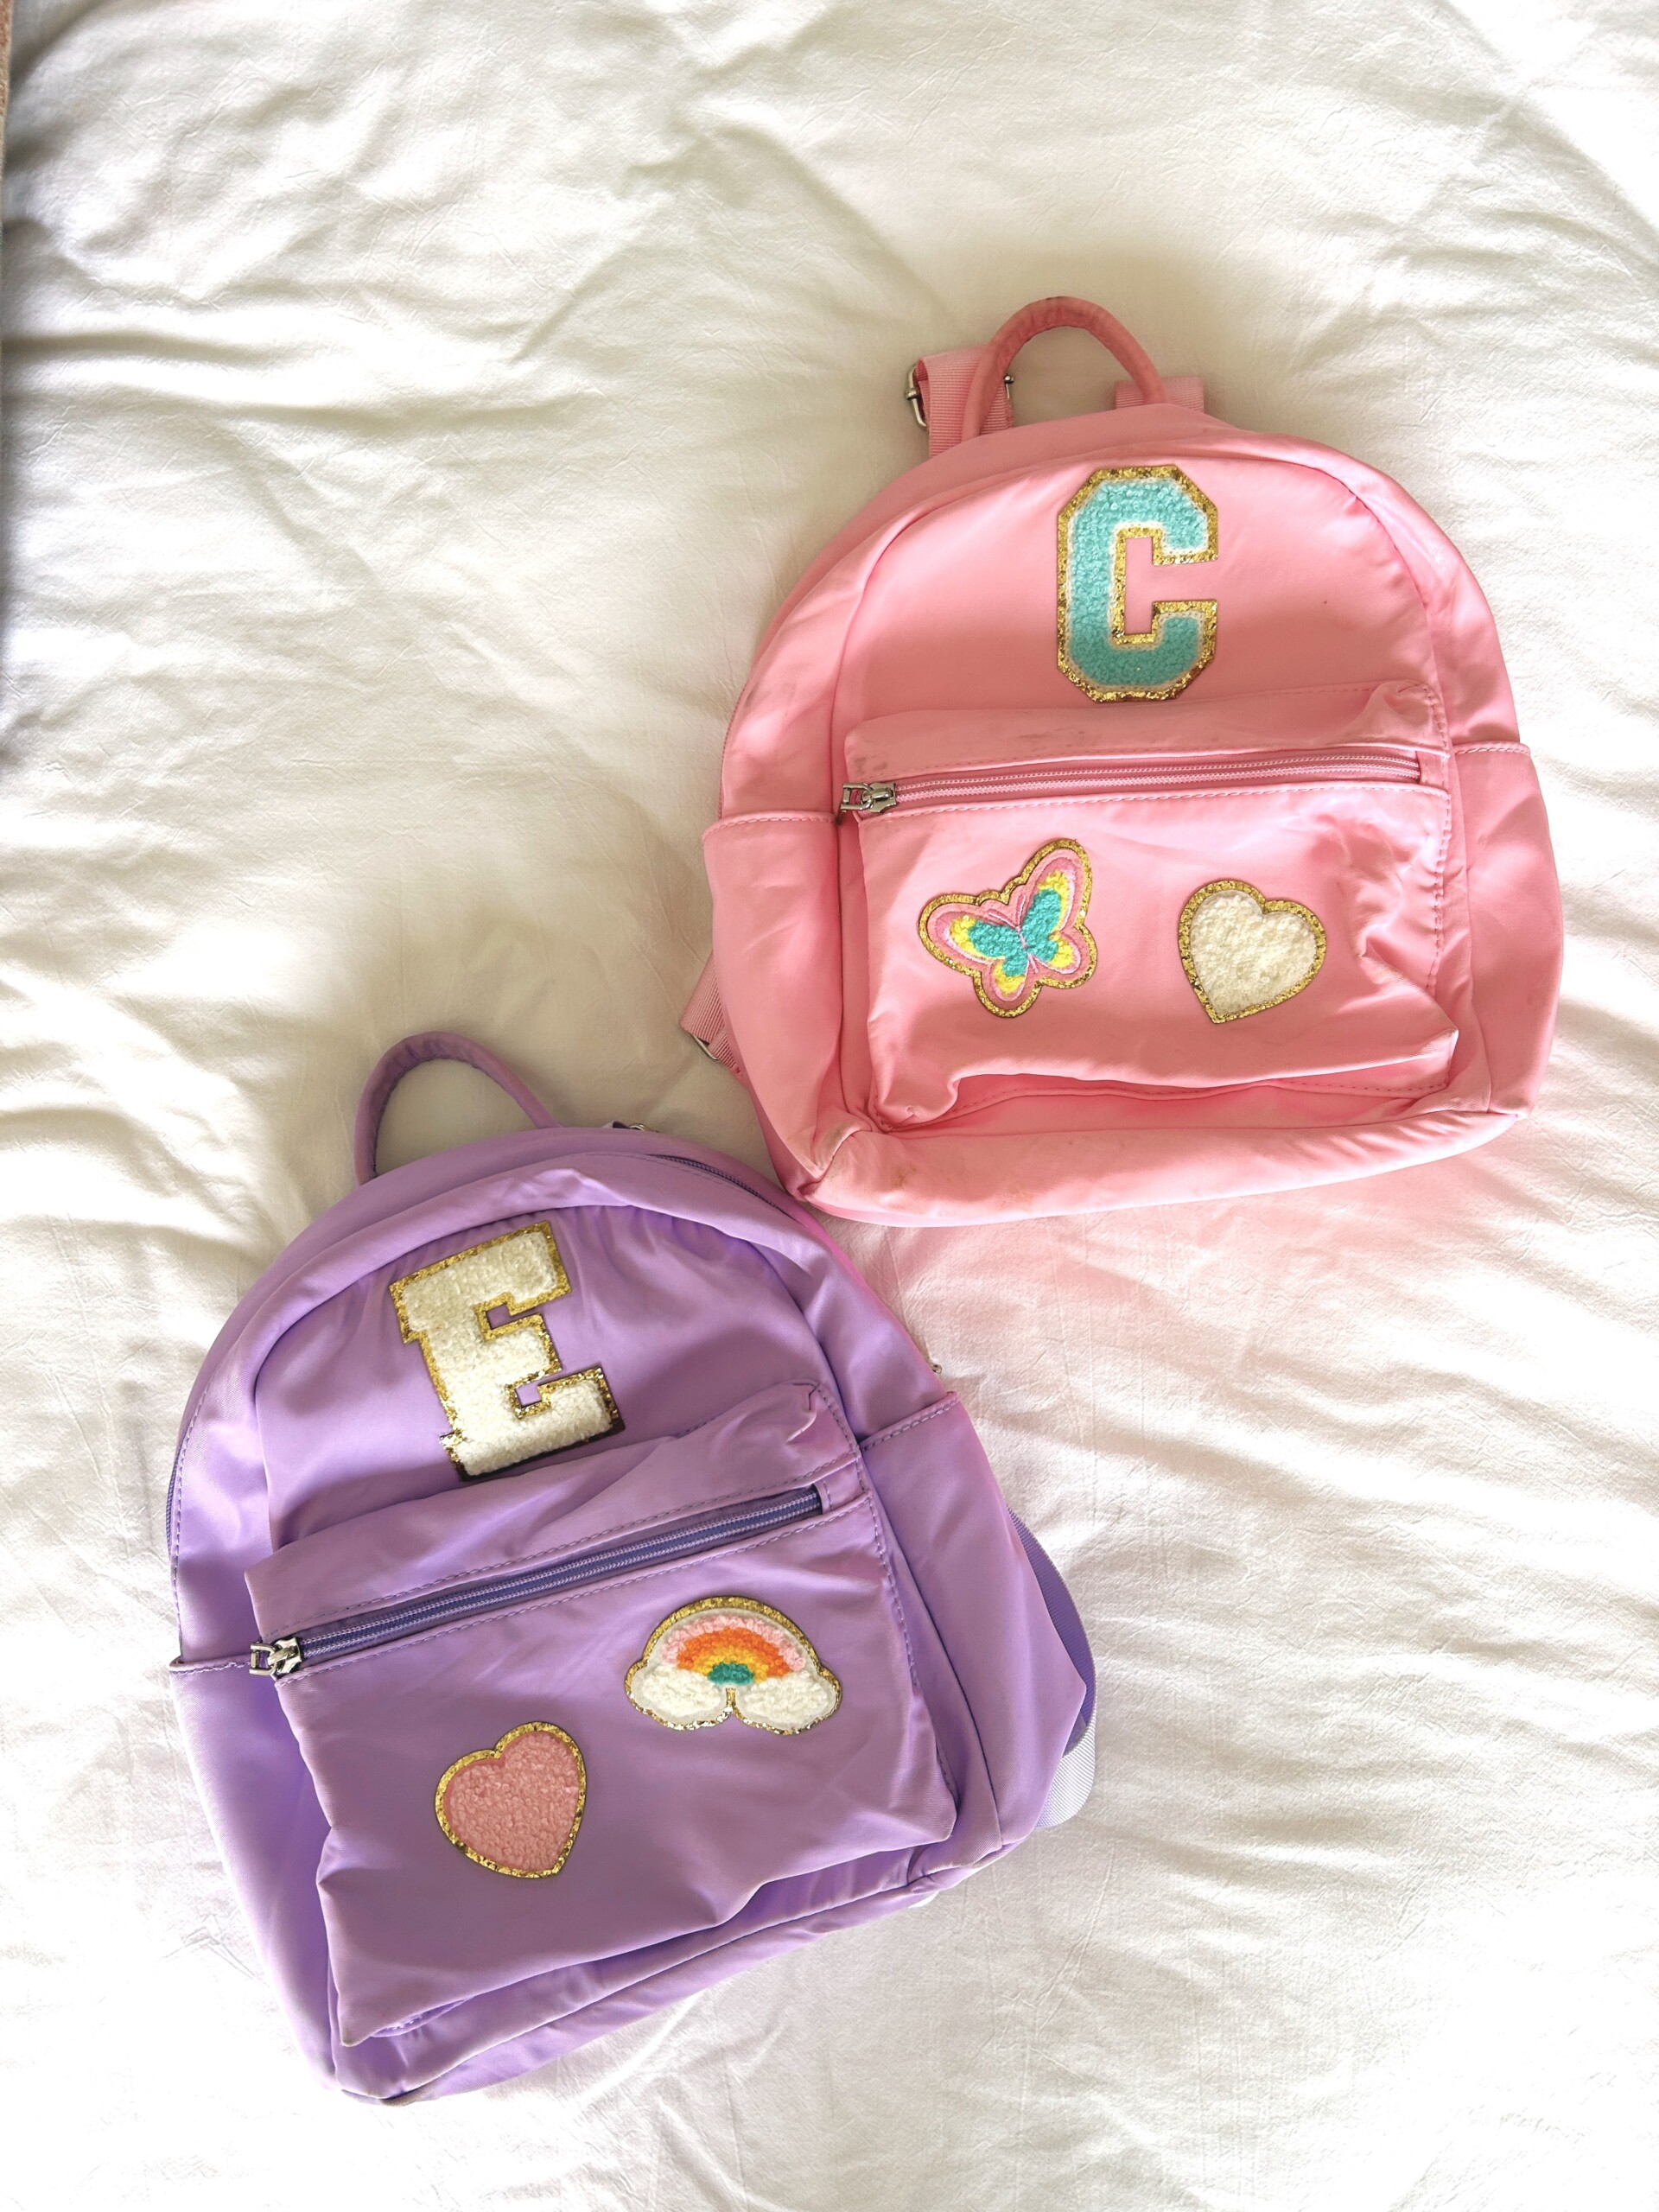
I made these backpacks (although perhaps “assembled” is a better word) for the girls for Christmas last year and always get questions about them when I post a picture of them on IG. I thought today I’d share a little “how-to”.
I got the idea from Stoney Clover. They have the cutest backpacks and travel gear, all in the prettiest pastel colors and adorned with fun, girlie patches. I originally planned to get the girls each one of their mini backpacks for Christmas, but once I added the patches the total price was insane for two.
After looking on Etsy for an alternative, I decided to just go ahead and try to make my own. I ordered the backpacks and patches from Amazon and got to work. I wanted the girls to each have a special backpack that they could use for traveling. I am a big believer in hype building as the number one key to parenting. The girls feel a sense of ownership when they pack up their backpacks for a travel day. And that ownership lets them feel “bought in,” so to speak, which I think automatically puts them in a better mood. Kids who are “bought in” tend to go with the flow more.
Anyway, here’s how I made the backpacks.
DIY Stoney Clover Inspired Backpack
Pastel backpacks from Amazon
After hours–and I mean hours–of searching, I decided on these mini backpacks from Amazon. The straps, even all the way tightened, are still a little big for my girls, but I think they will grow into them. Otherwise, they are perfect and have held up great the last six months.
If you really wanted to go nuts, you could put a patch on this fanny pack or this toiletry bag. The options are endless.

Chenille patches
I ordered a few different packs of chenille patches and absolutely agonized over which ones to put on which backpack. Poor Tyler thought he’d never heard the end of it, lol. I got an initial for the top of each and used a couple patches from this multi-pack for the pockets.
I also LOVE all of the patches from this pack. And this pearl minnie patch would be so, so cute for e Disneyland bag.

Iron on transfer paper
Even though the patches were supposed to be iron-on, they weren’t sticky enough and kept peeling off. My super crafty neighbor suggested using iron-on transfer paper to reinforce the backing, and that did the trick. I traced each patch and cut out the shape in the transfer paper and applied it to the back of the patch before ironing it on. I used a tea towel to make sure I didn’t burn the patch or the backpack. I used an ironing board under the top part and then stacked a few coasters in the pocket to give me a hard surface to iron on the patches there.

It’s a pre-weekend pick me up: just a little note with links to the latest blog posts, what I’m reading lately, and products I’m obsessed with. Think of it as a friend dropping off a surprise latte in the morning--you know?


